Showing posts with label improv. Show all posts

Sunday, December 1, 2024

Here and There and Back again

Back in the spring, my friend Chris brought me this orphan block and said "let's do something together with this"


And you know I never say no to a fun collaboration, or a challenge! So I added a checkered border to her block and passed it back to her...

And then she added more....
And so on...


Until eventually we had a completed quilt top! I matchstick quilted it on my domestic machine, added some big stitches with 8 weight pearl cotton and bound it in lime green after auditioning many options...


Catherine suggested the name Here and There and Back again and it fit perfectly. The finished quilt is 47"  x 33".
 

Monday, September 2, 2024

Improv Challenge week 2

 Are you ready for a new challenge prompt? Did you find time to play with prompt #1? Here's what I came up with...

Last week's prompt was stripes in pink and purple. I played around in my art journal and after creating a fun painted page I decided to make the blocks above. You can read more about our challenge here. Feel free to jump in any time!

Meanwhile, here's a new challenge to start this week...


Squares in purple and orange! Hmmm I'm going to need to think about this one.... maybe play a little more in my art journal before I sew. Can't wait to see what you all come up with!


Wednesday, August 21, 2024

Improv Challenge

 The other day over lunch my friend Chris and I were celebrating the near completion of a recent collaboration (more on that soon!) and wondering what we should do next. We tossed around lots of ideas and finally landed on a fun improv challenge. It will allow the two of us to make quilts simultaneously following the same biweekly prompts. It will be fun to see how different our quilts end up! Here's the really exciting part.... we'd love for you to play along. 

Every other Monday Chris and I will each be spinning a wheel we've created on the app tiny decisions. My wheel will determine a technique/shape that is to be created. Chris will spin her color wheel twice, giving us two colors to work with. Use one, use both, add another color of your choosing... there really are no rules. During the next two weeks, work with the selected technique and colors. Make a quilt block, ten quilt blocks, add to a previous block, you get to choose.

Are you ready? Here is the first prompt for our challenge:


We can't wait to create stripes in pink/purple! If you join in, post your improv on Instagram using the hashtag #improvchallenge2024 and follow Chris and I at @scarf.mama and@ellynz.

I'll be posting our next prompt here and on my instagram feed in two weeks!


Saturday, June 15, 2024

Collab with Chris

Everyone knows I love a good collaboration. Recently I had an opportunity to make a quilt with my friend Chris....
I spent several days helping Chris sort out the clutter in her sewing space. It was fun finding things Chris had started and making a plan for future quilting projects. In the bottom of one bin of assorted fabrics and blocks, I found the improv blocks Chris had made during our workshop with Debbie Jeske in 2018. I couldn't bear to see them all unassembled, and, as Chris had no plan for them, I tucked them in my bag, took them home and set to work puzzling them together.

The final quilt is fun, Chris's signature rainbow color palette and my assembly. I especially love the black and white stripe she added to some of her blocks. It adds a bit of zing!
This was a fun, unexpected project!
 

Wednesday, May 8, 2024

Spot On

Time for some catching up! Back in January my pal Debbie was cleaning out her stash and gifted me a beautiful stack of improv hourglass blocks she had made last year. 


I had a wonderful time assembling them into a quilt top, adding a scrap or two of my own alone the way to make things fit. As I assembled it, I began adding appliqué dots here and there, because, why not? The Modern Quilt Guild has recently embraced Maximalism as an element of modern quilting and I thought this was the perfect opportunity to get on board. 


I attached the spots with hand stitching (blanket stitch with #8 perle cotton). If you look closely, you can see that I stitched some ghost circles into the background as well.

My friend Martha popped it onto her longarm and added free motion loops and circles I finished it off with big stitched binding. Such a fun collaboration with friends! I love the quilt, which finished at 46"x54".


You can read Debbie's account of our fun collaboration here. 

Thursday, May 18, 2023

Triangles everywhere, all at once

 I just realized I left you hanging. I never shared my completed Improv Triangle Sewalong quilt.... although I did share some of my process here. Well it's finished! Introducing, Triangles everywhere, all at once...


The improv triangle units were made using the process Nicholas Ball spells out in his book, Inspiring Improv. I used fabric I had painted with my gel plate and acrylic paints for the triangles and assorted teal, aqua and orange solids from my stash.

When it came time to quilt, I went a little bananas! It is all walking foot quilted on my domestic machine (a Janome 6600). I stitched giant triangles and then echo stitched them, using several shades of aqua thread. There are also some hand stitched triangles in there which are hard to see here. It was loads of fun!

Monday, May 8, 2023

Pantone Quilt Challenge 2023

I love participating in the Pantone color of the year quilt challenge and have made a quilt just about every year since I learned about it! This year the color of the year is Viva Magenta. Sarah and Elizabeth hosted a challenge and I am happy to share my finished quilt.

My intention was to simply make a wonky square in a square quilt and call it good enough. ahhhh intentions! When I got this pieced together I knew it wasn't done. First of all my "wonky" blocks were not wonky enough! It looked like I had tried unsuccessfully to be precise. UGH!

My friends on retreat encouraged (ok, they were pretty forceful about it! HA!) me to cut it up. Why not? I fearlessly sliced it in 30 degree angle strips, scrambled them up and sewed together, but it wasn't enough. So I sliced again and inserted a new color to the mix! Although the crowd was chanting for lime green, I stuck with my trusty aqua and was happy with my choice. 

I cut these angled strips into rectangles which became square blocks, which eventually became a nine patch! Clear as mud? To me too haha but I'm quite happy with my final quilt. I'm calling it Shattered Magenta.
The main fabric is Kona Pomegranate which is my favorite choice for Viva Magenta. I added additional pinks and oranges from my stash, as well as the aqua. I quilted it in an angled grid on my domestic machine and finished it off with faced binding.  The final quilt is 32" square. Off I go to add it to the link up! (added: I didn't read all of the words and failed to note in my linkup that my quilt is 32"x32" and I am in the USA!)
 

Monday, February 13, 2023

Another Improv Triangle Sewalong

 Well, I didn't mean to start another quilt but here we are. I can't resist Nicholas Ball's (@quiltsfromtheattic) improv triangle sew alongs, I've participated twice before (here and here) and when he announced a third opportunity to sew along with him I jumped right in.

As I told you in my last post, I've been enjoying gelli printing lately. I had a stack of fabrics I had painted and quickly decided those should be triangles...


After lots of cutting I had almost 90 triangles ready to sew! I pulled out my teal/aqua solids and began making triangle units using Nicholas' method. His improv book is one of my favorites! It was looking a bit ho hum to me until my friend Sarah suggested I add splashes of orange. Perfect!


Triangle units began to gather on my design wall. Then I went into crazy mode and couldn't stop sewing.

By the end of week two, this is where I landed. Week three is all about joining the triangle units together. If you look closely, you can see that I already got a jump start on this process. The middle section of my quilt is all puzzled together. This is my favorite part of improv quilting, puzzling the pieces together. I will have a finished quilt top by the end of this week and look forward to sharing it with you.


Friday, January 13, 2023

not quite a quilt coat


Hello friends! I have a fun finish to share with you today. Here's me in a denim jacket I recently dug out of the back of our coat closet. I'd forgotten I even owned it! I looked at it for a bit and then I had an idea. So I set to work.

Last weekend I was on retreat with my quilty pals and I whipped up this improv panel using some extra solids from projects I had brought along. I used a few of may favorite shapes and techniques, triangles and Xs, skinny lines. The finished panel measured about 13x16 inches, but if you have a jacket of your own I recommend measuring the back panel between the seams before you begin.


Even with measuring I cut off a couple of elements to make my panel fit. Here are some steps I took to attach my panel....

I made a pattern that fit perfectly in the space I wanted to fill. I used pattern tracing paper so I could see through it. When I had the perfect fit, I laid it over my improv panel and two layers of cotton flannel. Then I cut all three layers into the perfect shape.

I bound the edges of my layers with a single layer of 2 inch binding. I used bias cut strips to accommodate the curves on the sides of my pieces. I sewed the binding onto the front and neatly folded and pressed it around to the back. I didn't worry about the raw edge on the back since it would be completely encased.

I pinned my piece onto the jacket and machine stitched all the way around at the outer edge of the binding. 

I wanted to secure my piece to the jacket back so it didn't pull away. Using  size 8 perle cotton thread I stitched xs, running stitches and chain stitches embellishing the improv piece. My stitches went all the way through the layers attaching them to the jacket. And yes, you can see the back of my stitches inside the jacket.

I really love the end result! I did add a few embroidery stitches to the front of the jacket just for fun but the real party is all in the back! Will you be making one too?

Tuesday, June 14, 2022

My 2022 100 Days Project

 Well haven't I been a horrible blogger these past few months? Geez. I will tell you I've been so busy making things I haven't made the time to blog! I guess that's a good thing, right? Anyways, I have some serious catching up to do. Let's start with today's finish, shall we?

Way back in February, I posted here about my plans for this year's 100 Day Project. Just to recap, I purchased recycled men's dress shirts at the Goodwill and planned to make 100 improv quilt blocks inspired by The Great Resignation (if you're not familiar with this concept, google it! So fascinating). I created a wheel using the Tiny Decisions App on my phone which gave me a way to randomly choose each day's block type.

I also created a hand written document to keep track of each day's blocks. Setting myself up for success!
I'm happy to report that I successfully completed all 100 blocks, assembling my quilt top as I went along. The hardest part for me was sticking to only one block each day! The only time I made more was when I knew I was going to be traveling.... I didn't want to fall behind. 

Here's block one...
each block is 5" square

If you want to see my week by week progress photos, you can check them all out here, on Instagram.

I managed to get the quilt back and the binding all out of the remains of my recycled shirts! I quilted the finished quilt top on my domestic machine and finished up the binding today! The finished quilt measures 48"x45" (the extra width comes from 1/2 blocks I added to each row to stagger my layout).


Oh, I also added improv letters to spell out "I Quit", keeping with my theme of the Great Resignation. Many on Instagram thought I meant I was quitting the 100 day project. They were surprised when I kept going! 

I'm really happy with my finished quilt! This year's 100 day project was a huge success for me. Have you ever done a 100 day project? How did it go?


Friday, February 4, 2022

Preparing for my 100 day project

 The "official" 100 Day Project begins on February 13 this year. I have really enjoyed doing this the last two years. You can read about my bojagi project (2020) and my monster project (2021) here on the blog. Both of these focused on learning a new skill, which I thoroughly enjoyed. This year, I'm heading in yet another direction.

I was inspired by the phenomenon of the Great Resignation of 2021, where Americans resigned from their jobs en masse, initially as a covid response then later as a general strike against workplace policies/pay and government replies. I decided to make a quilt in response to this issue. Also, it is not lost on me that while everyone was resigning from the work force this past year,  my husband had the opportunity to return to work in a career he loves, after a long stretch of unemployment. There is irony there for sure.

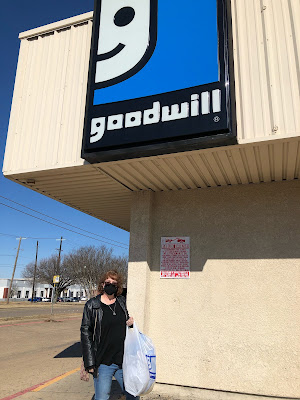
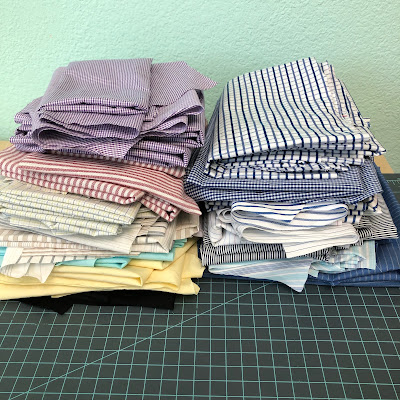
First step was to gather supplies. I purchased 15 mens dress shirts from Goodwill and another thrift shop, where they had symbolically been left to die as their owners resigned from jobs.

I tried to get a good mix of colors, in stripes, plaids and solids. My pal Chris quickly pointed me to the larger mens sizes where I could get more fabric for the same price. With deep discounts, a senior discount and some good searching, I ended up spending a little over $5 for each shirt.

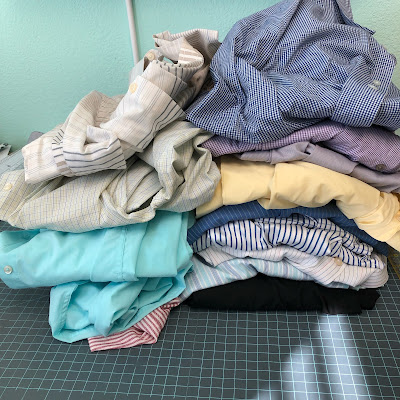
This is what 15 shirts looks like! I washed them all as soon as I got home. Many had holes or stains which was not a problem for me.

I carefully cut them up, salvaging as much fabric as I could. With fronts, back, sleeves I was able to get approximately 3/4 yard fabric from each shirt. Some of the larger shirts yielded even more.
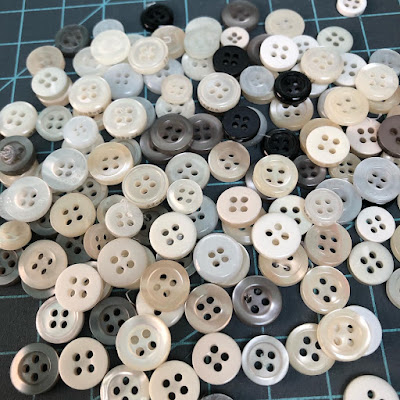
I also saved as many buttons as I could! I'm always searching for dress shirt buttons to repair my hubbys shirts. These will come in handy!

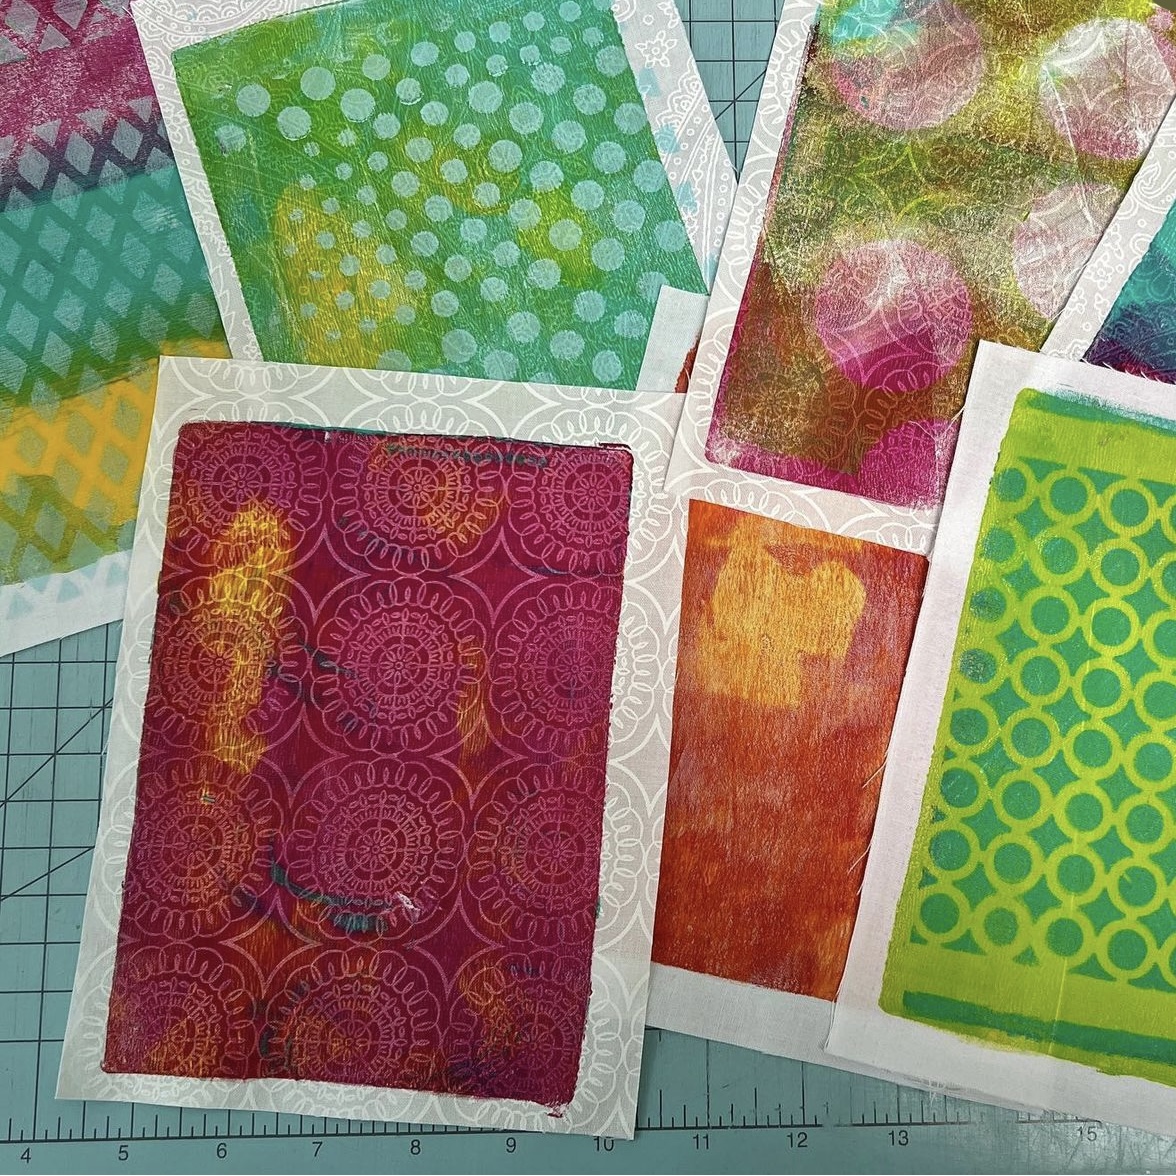
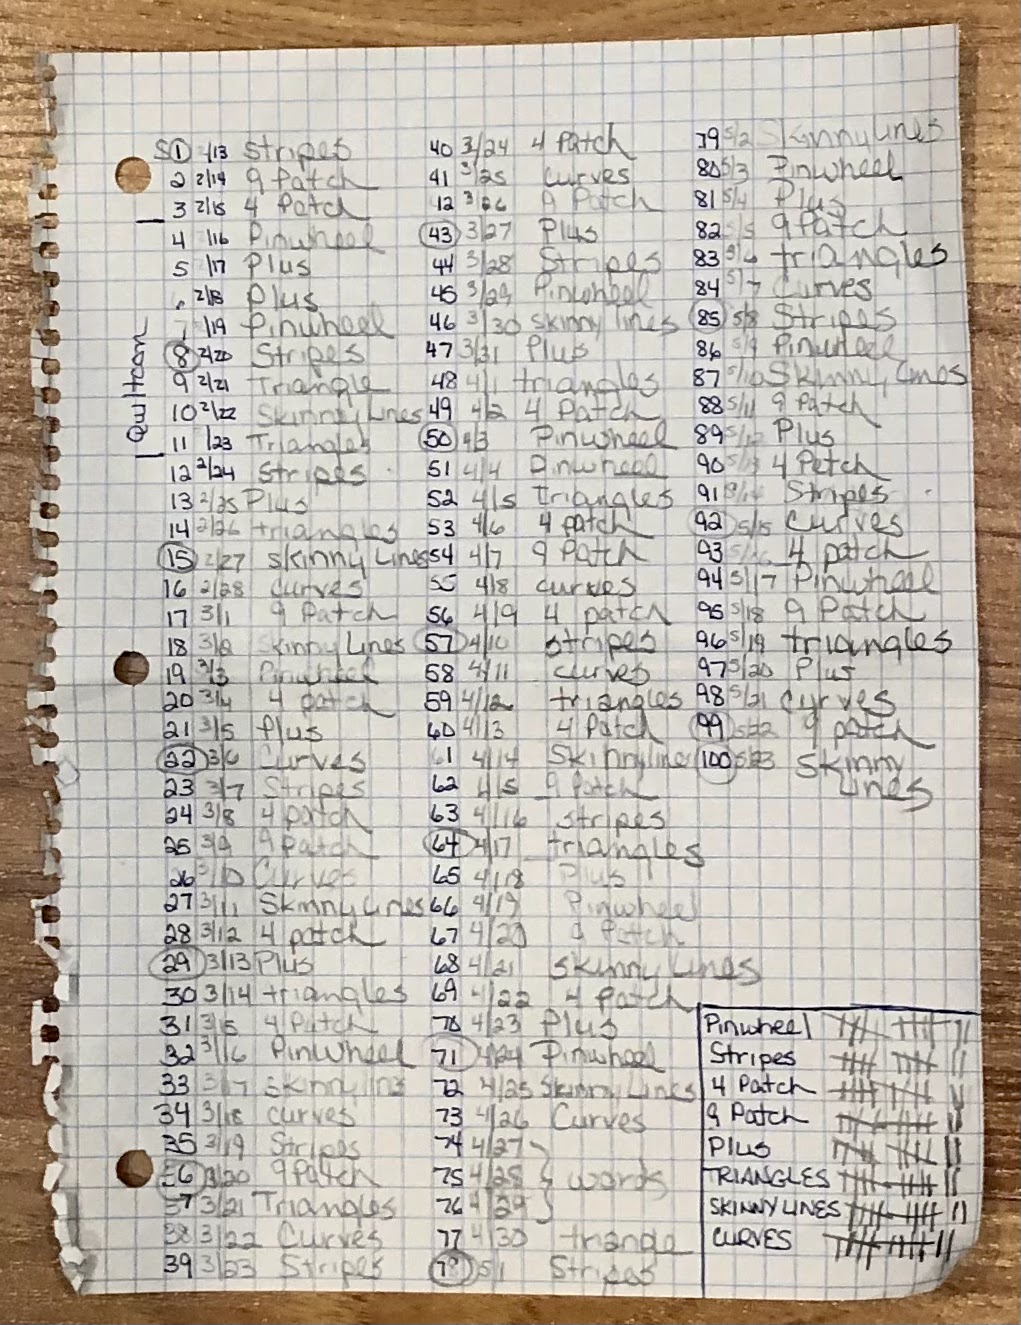
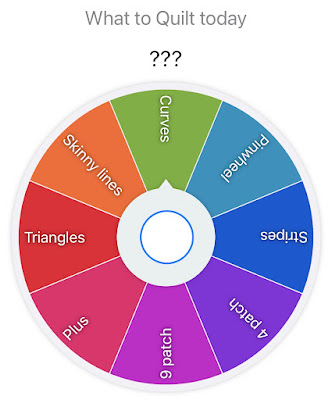
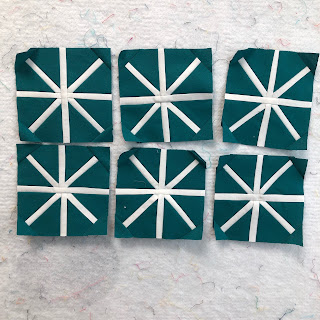
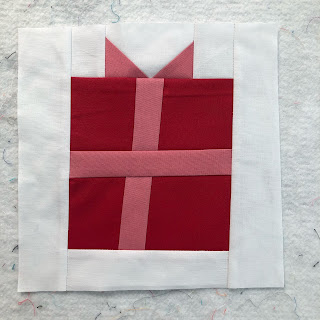
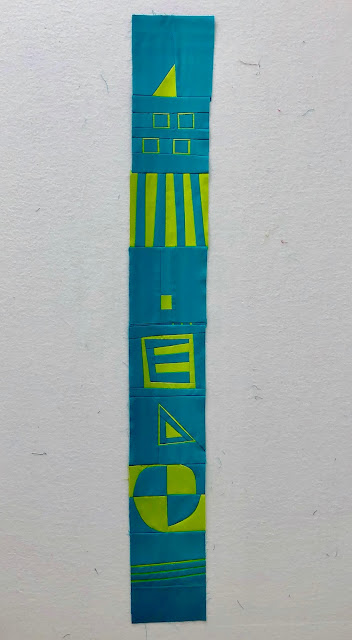
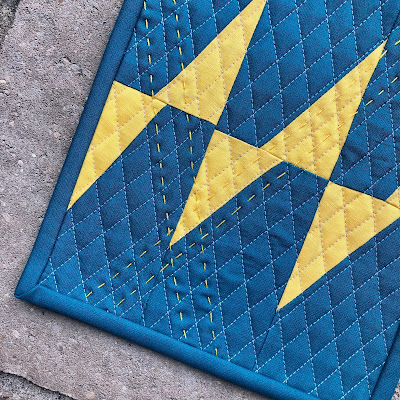
My plan is to make one 5" improv block each day of the project. These will be random styles of block, as selected by my randomizer wheel.

I created this wheel using the Tiny Decisions apps on my phone. Sarah told me about this app and its will work perfectly! Every day I will spin the wheel and do what it tells me to do. Brilliant!


So, I'm ready! I have missed having a structured project to work on the last couple of months and can't wait to get started. Are you doing a 100 day project this year?


Wednesday, December 29, 2021

Quilts Unscripted Blocks

 The Quilts Unscripted Bee continues to challenge and amaze me month by month. You can see posts about my past blocks here. I thought I'd share the rest for 2021 today.

In November, Loide asked us to make a variety of Christmas blocks. She put very few restrictions on us which was fun, but at the same time challenging!

For my first block I made a Christmas tree! Very structured yet improv as I just winged it, no pattern.


It's a smaller version of the tree mini I did for the MQG earlier this year!

Next up, snowflakes. I debated putting them all together in one block, but decided to leave them apart so she can use them as she desires.

A Christmas Present seemed like a good choice for my third block... the most improvy (is that even a word?) of the three.
As Loide is a local quilty friend, we were able to meet for lunch when I delivered her blocks, so it was a big win!

Elizabeth was up for December.  She asked us each to make a sash, using 2 contrasting solids, at least one of which was bright and saturated. I journeyed to my local quilt store, which has a whole wall of Bella Solids, and was overwhelmed and confused!!! Lyssa, who works at the shop and knows me well, walked up and pulled Limeade and Turquoise off the wall and said "this speaks Ellyn to me" well duh! I was trying to be unique and creative when all I really needed to be was myself. 

My finished sash is 6" wide and 47" long. And that E in the middle? A total accident! It can stand for Ellyn or Elizabeth or whatever she wants to think. It's already arrived safely in Arkansas. Now I impatiently await the January prompt.

You can follow our group shenanigans at #quiltsunscripted


Sunday, December 26, 2021

itty bitty improv

Well, despite all my fussing, I did finish 20 quilts for my Through Ellyn's Eyes project before the end of the year! As I had speculated, it's TINY! Finishing at just 7"x9", thus the name itty bitty improv, it would make a good mug rug. 


I played with some spiky triangles, one of the very first techniques I learned when Debbie (A Quilter's Table) came to teach our guild years ago. It's one I return to often and was fun to revisit in just two colors, Kona Corn Yellow and Glacier. Quilted very quickly on my domestic machine with some accent hand quilting big stitched in at the end. 


I will admit to feeling a bit of a letdown with this project wrapping up. I look forward to compiling my conclusions (I will share some here later. If you'd like to hear a detailed report and see all of the quilts in person, let your guilds program chair know I'd love to come visit!). 


Thursday, December 23, 2021

Scalloped Rainbow

 Even with the business of the holiday season, I managed to complete quilt #3 in my Through Ellyn's Eyes series! I give you Scalloped Rainbow. 

What began as a stack of improv quarter circle blocks made on a whim at the day retreat center became this fun mini that measures 14"x24". Grid quilted and faced all on my domestic machine. I used the full rainbow of colors from my series for this one: Kona Red, Orange, Tangerine, Corn Yellow, Chartreuse, Glacier and Capri. 

I might be finishing up one more (tiny!) quilt to bring the number to a nice even 20, but I'm delighted with where I am so far. 


Wednesday, November 10, 2021

Welcome to my Neighborhood

The more I play with buildings in quilts the more fun I have! This one is the 14th quilt in my Through Ellyn's Eyes series and I had so much fun creating this little rainbow neighborhood...
I especially love the way the slant black roofs look on this one. I think I'll probably be moving into the yellow house.... I like the big window!  You?

 This one measures 16"x18" and I walking foot quilted it on my domestic machine. The colors I used are Kona black, red, tangerine, corn yellow, chartreuse, glacier and capri.

Friday, October 29, 2021

Triangle Trees

 Who else loves a good sew-along? I was excited when Nicholas Ball announced another Improv Triangle Sew-along this month. His improv book is one of my very favorites and his triangle method is the best. First I thought, can I do this? I don't want to neglect my Through Ellyn's Eyes project. boo. Then I thought, wait! What if I make it part of my project?! Jackpot. 

This time around, Nicholas encouraged us to make our triangles holiday trees. I pulled the colors from my project that speak Christmas to me, Kona Red, Chartreuse, Glacier and Capri with a bit of Kona White thrown in. 

First up, make a pile of triangle blocks...

look at the awesome snow capped trees! suggested by Nicholas

Then I started moving them around on my design wall. This is one of my favorite parts of improv quilting...
My layout changed a bunch of times before I landed on this completed quilt. Here it is, all done! It's the biggest quilt in my series so far, 43"x25". Walking foot quilted in all the colors on my domestic machine and faced for a nice clean edge.

like my cute shoelaces? I wove them on my inkle loom

You can see the quilting better in this photo. I love where the colors cross at the bottom...


So there it is! Quilt #13, Triangle Trees!