Showing posts with label inspiration. Show all posts

Friday, November 19, 2021

A Collaboration with Sarah

 Several months ago, when Sarah Goer and I began our Zoom calls based on In Tandem Art (read more about that here) we decided to issue each other a challenge. We each chose a photo from our archives, sent our photo to the other, and then made mini quilts inspired by the photos. It was great fun and a good way to kick off our stint as pArtners. In case you are wondering, yes, we are still meeting over zoom every 2 weeks, holding each other accountable, inspiring each other and occasionally solving world problems (I wish!).

The photo I sent to Sarah is this one.....

During the strict quarantine times of Covid, hubby and I would go driving around our area (north Texas) and explore buildings in small towns we'd never seen before. I love the colors and architectural details of this building. 

Sarah created a wonderful minimalist mini inspired by my photo. 

Sarah's quilt measures 9"x7"

I love that it captures both of the things I loved about the building. 

Sarah sent me this photo of a door at the Rock of Cashel in Ireland...

I was intrigued by the angles created by the molding on the door. Also the neutral color palette, which is not my norm at all. I loved the green creeping into the aging stone and wood. Here is the quilt I created...

my quilt measures 13"x13 1/2"
I used all prints (another unusual choice for me!) and fabric from my stash. 

This was a fun challenge and a great way to collaborate and learn more about each other. I highly recommend you find a quilty pArtner and try something similar.

To read more about this project, check out Sarah's blog.


Friday, October 15, 2021

Harlequin Maze

Where does your quilty inspiration come from? I just never know when it's going to hit me. A couple weeks ago I found myself really studying the stained glass windows in the chapel at church (I know, I know, pay attention Ellyn. And I was, I promise.)

These windows are so incredibly beautiful. This particular day, it was those diamond shapes that spoke to me. 

By the time I turned them into a quilt, they had changed a lot. First off, the color. And then, I started removing some of the dividing lines. Soon this maze evolved.        

I had already made a bunch of black and white quarter square triangle blocks. They were just hanging out on my design wall patiently waiting to be used. Add in a curvy line and a bunch of tiny floating triangles and Harlequin Maze began to evolve. I quilted it with my walking foot and big stitched the binding in red. Presto! Quilt #11 in my Through Ellyn's Eyes series was done in no time.

Colors used: Kone Black, White and Red.

Friday, August 20, 2021

More Triangle Play

More than two years ago, I was inspired by this triangle pattern, created in stone on a highway bridge near my home.  

I managed to create a foundation paper piece pattern to represent each section and, after some playtime with the pattern, made this mini (still unfinished) to replicate the bridge.
Then, I put it all in a box and promptly forgot about it, as we do. Sigh...

Fast forward to this week, when I pulled it out again and decided to use those triangles in a playtime mini for my Through Ellyn's Eyes project. I decided to use my Kona Red, Orange and Tangerine since that gave me the most monochromatic shaded look (not really. humor me here. Honestly it ended up with quite a bit of contrast).

The finished mini is 12" square and uses 3 FPP bridge patterns and 3 reverse patterns. I quilted it with my walking foot in several thread colors to match the fabrics, echoing the angles in the triangles. I'm calling this one Triangle Play 2.

So, with six quilts on my design wall, I can see some trends evolving! Several more ideas are already in my sketchbook which is good. I had worried that I would run out of steam, but that does not seem to be the case! Whew!

Tuesday, July 13, 2021

Through Ellyn's Eyes

In the last several weeks, an idea has been percolating in my brain. Today I am putting it out there for the world (or at least a few of you!) to read, so that you can hold me responsible and follow along with my wacky plan. So here we go!

Much of this idea came to me after reading Lisa Congdon's book, Find Your Creative Voice: The Essential Guide to Working Your Creative Magic. Actually, reading it for the second time, highlighting portions that spoke to me (honestly, it would have been easier to highlight what didn't speak to me! ha!).  This book really got me thinking. What is MY creative voice? Do I even have one? I decided it was worth the time and effort to go chasing after it. Thus, Through Ellyn's Eyes was born. Here's what I know so far:

Goal: To create a cohesive body of work in an effort to develop my own voice.

Timeline: Six months, July-December 2021. I am planning to commit 10+ hours per week to this project. 

Colors: Use of seven specific Kona Cotton Solids, plus black and white. Narrowing down my colors proved to be a chore, but I am happy to say, this step has been completed.

The colors I will be working exclusively with are:

  •     Kona White
  •     Kona Black
  •     Kona Red
  •     Kona Orange
  •     Kona Tangerine
  •     Kona Corn Yellow
  •     Kona Chartreuse
  •     Kona Glacier
  •     Kona Capri

Although I will use only these colors, I do not intend to use EVERY color in EVERY piece of work.

Other parameters: Based on my current personal trends, these are my intentions, which may evolve as the project progresses. I plan to make a series of mini quilts, allowing me to walking foot quilt them on my domestic machine. I also plan to include some pearl cotton hand stitch accents in most or all of the quilts. These will all be original designs. Modern characteristics that I currently focus on include high contrast and graphic areas of solid color, improvisational piecing, minimalism and use of negative space. I intend to incorporate many of these in each piece. 

Lastly, I will continue to dabble in other creative work outside of this project. So, you will continue to see bee blocks, other quilts, weaving, etc in this space. I will document this project both here and on my instagram account, using the hashtag #throughellynseyes. If you peek over there now, you will see that I have already been working on my first quilt for this series! I'll share more about that very soon.

I hope you'll follow along, give me feedback and maybe even begin an exploratory journey of your own!

Tuesday, July 25, 2017

inspiration day at the Dallas Museum of Art

Ally and her new buddy Malibu were home for a couple of days last weekend....
Malibu is Ally's new service dog. She is a beautiful, gentle dog & is so dedicated to our sweet Ally (and Ally is equally dedicated to her! It's a match made in heaven.) If you want to know more of Ally's story, she blogs over at Teaspoon of Sprinkles.

We decided to take a trip to the art museum while they were here. It was Mali's first museum trip and she did really well.
Ally tends to favor modern art. I enjoy it too!
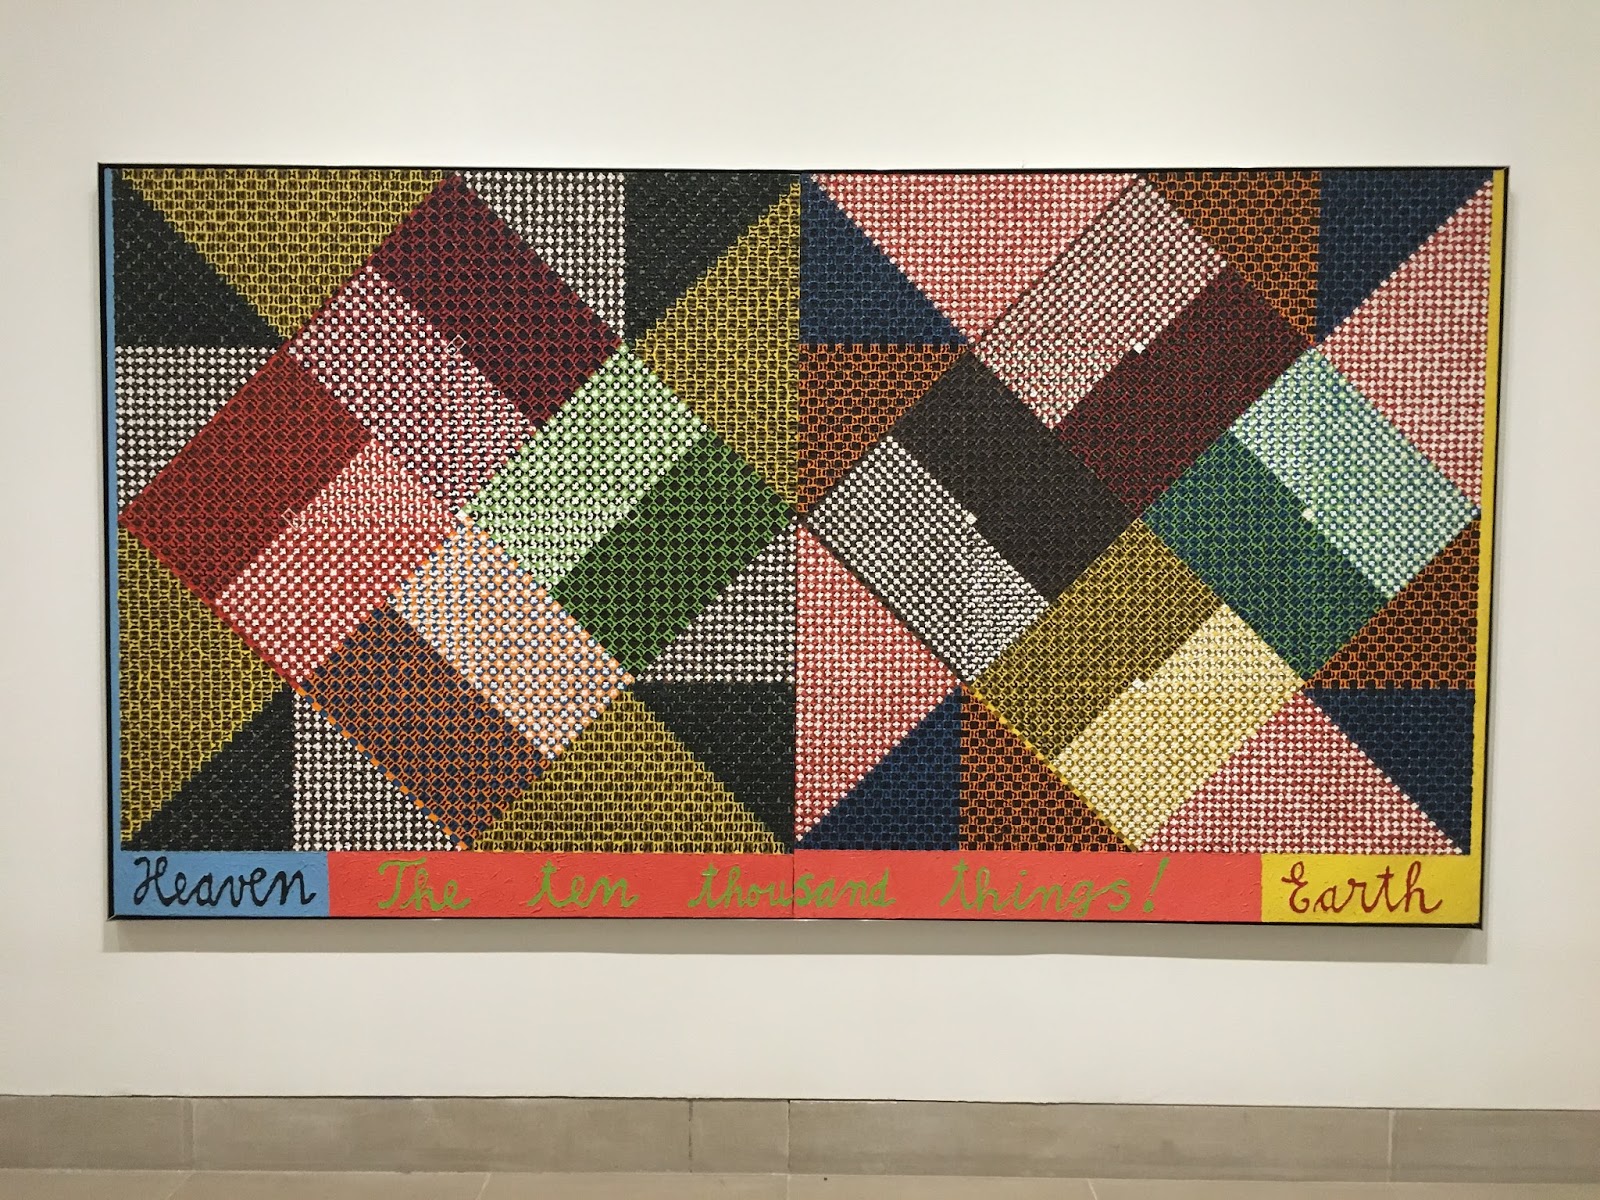
This painting screamed "make me into a quilt" to me.
This looked like a giant drop cloth. Ha! pretty cool though.

It was a great day, and wore all of us (especially Malibu!) right out.

Tuesday, May 2, 2017

Maui Glam bag

After seeing a Maui Glam Bag (pattern by Pink Sand Beach designs) a friend made, I really wanted to make one for myself. The bag is intended as a zipper pouch (2 zippers) but my friend had put a shoulder strap on hers and it became an adorable small handbag! I already knew from experience that Pink Sand Beach patterns are incredibly well done, and that the finished product is always professionally finished with proper interfacing support. I was all in!

Yesterday, I put together my bag, using 2 Cotton & Steel prints for the outside and some Art Gallery low volume prints from my stash for the linings/inside pocket.
I love the extra outside zip pocket to stash my phone

I didn't have any swivel hooks on hand so I attached my strap to the D rings on both sides
Inside pockets for credit cards, etc. I can't wait to put this little bag to good use!

Monday, January 23, 2017

my Wicked Funky Dresden

Last Friday morning I woke up with a quilt design dancing around in my head. This doesn't happen to me often, but every now & then things come to me in my sleep! Often I roll over and ignore them and then they are gone forever. This time, I dashed to my studio for graph paper and pencils and got it drawn out before it got away. Boy am I glad I did!
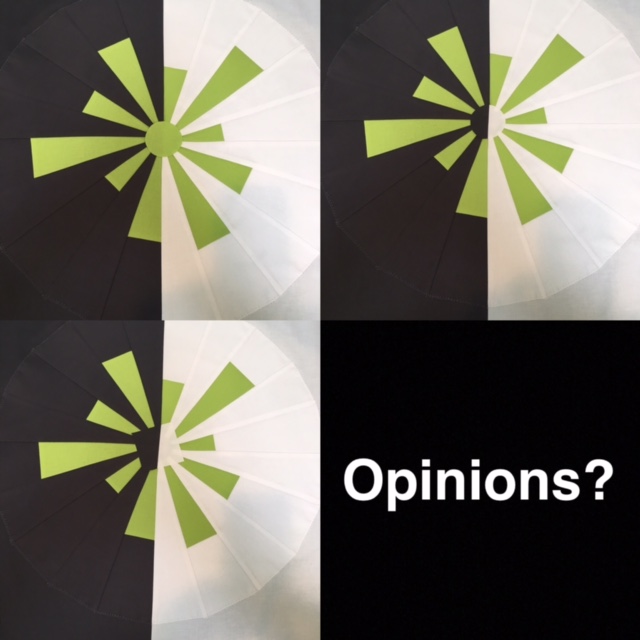
By the end of the weekend, my drawing was sewn into what I lovingly referred to as my "funky dresden".  Once it was all assembled, I was perplexed as to what I should put in the center. My first instinct was a split circle, to make it look like the background was coming through. But then I began to consider other options. I took to Instagram to see what others thought...
My original idea is top right. And many liked that too! The green dot, top left, got lots of votes from more traditional folks who wanted a place for the eye to rest. And the split square on the bottom? Also popular, mostly with those who wanted a bit of the unexpected. In the end, the votes were split almost perfectly in thirds! Well, that was helpful!

In the end, after examining the options for a day or so, I decided to go with the square.

Jennifer, who is tenseturtle861 on Instagram, suggested I name it "Wicked Dresden" based on the color scheme which reminded her of Wicked, the musical.  Brilliant! So this particular one is named Wicked Funky Dresden, but the pattern overall is just Funky Dresden. Thanks Jennifer!

By Sunday evening, I was stitching down the binding on my finished quilt (maybe my fastest ever quilt finish)

My background colors are charcoal gray and white, with the lime green pop of color. Finished quilt is 30 inches square and the very feeble quilting was done on my domestic machine, just radiating lines which s fine, I guess. I'd really like to try a spiral on my next one, but I've never done that before & frankly it scares me. We'll see.

I also did matched binding so as not to take away from the simplicity of the quilt.

So there you have it. There has been interest in a tutorial. Naturally I was in such a hurry to get this done I didn't take any pictures of the process. So, I will work on a tutorial, but I'm going to need a few days. Meanwhile, if you're anxious to jump in and make one too, here's what you will need:

1 yard dark background
1 yard light background
1/2 yard contrast
18 degree dresden ruler - mine is creative grids. This will give you a 20 section circle. If you have a different size, that's ok, you just might need more or fewer wedges for your quilt
batting & backing bigger than 30" square.

 I can't wait to see what others come up with!

Sunday, April 24, 2016

a week in Charlotte

I'm just home from a wonderful week visiting my friend Kathie in Charlotte, NC. You might remember that I visited her when she lived in Asheville. Back in 2014 I was fascinated with Kathie's weaving, just as I have been for the 20+ years that I've known her. But, I didn't know enough to really appreciate what she does. THIS time.... now that I've been weaving for a couple of months on my rigid heddle loom, THIS time I had a solid appreciation for everything Kathie does. And a million questions! 

We went to visit her off site studio where she was working on weaving baby blankets....
 And we spent TONS of time in her studio at home. Check out this yarn! Kathie has every single color of 8/2 cotton that WEBS sells...
 Look at the light streaming into her space...
 even her shuttles look pretty in a basket on the shelf...
 and bobbins in another basket...
and guess what? Kathie taught me to weave on her small floor loom! I learned so so much. Check back tomorrow if you want to see what I made in just a week!

Wednesday, April 6, 2016

Moda challenge

Several months ago, Lissa Alexander (aka Moda Lissa) came and spoke to our Modern Quilt Guild. At the end of her talk, she handed out little bags to all of us. Each bag contained 4 mini charm packs and some Aurifill thread. She challenged us to "make something using at least some of each of the charm packs, adding a yard or more of Moda solid or Grunge. Fun!
Last night we revealed our challenge pieces at guild meeting. Mine had been done for quite some time (I did most of it on retreat in February.) I had lots of low volume mini charms in my packs, so I combined them with the prints I had received and made lots and lots of half square triangles. My layout was inspired by this fabulous quilt. The borders are a grunge. I had so much fun quilting in the ditch around my spirals, extending the quilting into the borders.
here's the back, you can see the quilting better
Thanks for the fun challenge Lissa! 

Friday, November 13, 2015

Christmas circle quilt

About a month ago, my pal Mahriam over at Three Owls Handmade finished up her "tiny scrappy circle mini quilt" and I absolutely fell in love with it! In fact, I tried to steal it when she brought it to our last Crafty Tuesday gathering but she didn't fall for it. darn. So, I set out to make my own. And, because I never do anything according to the directions, I made a few revisions. First off, my circles are a tad bigger than hers (about 1 1/4" diameter). I traced the circles onto heat & bond lite, fused them onto my fabrics and then cut them out....
that aqua snowman makes me giggle. 
I cut 144 in total. Also, I decided to make mine a Christmas circle quilt. I selected all fabrics in reds, greens & aquas (I later added in some gray). Many of the fabrics are holiday fabrics, others are just fun fabrics that fit in with the colors I wanted.
I had a light gray solid on hand and I liked the way it looked as a background. I squared it up and pressed it well. Then I began laying out and fusing my circles. I used a ruler to keep them straight(ish).  I laid them out in a 12 x12 grid and fused them well. I must confess, a few began to lift away from the fabric when I started to quilt. I did go back and glue some of them down with fabric glue. Most of the circles did fuse and stay well attached.

Mahriams circles were tinier than mine. Also she had way more of them than I do! But I am quite happy with my layout...
Goldilocks is making an appearance in all of my projects lately!
I began quilting in a organic (that's code for "not perfectly straight and I don't care") grid with light gray thread. Bound it up with a gray herringbone print and I love it! Is it too early to begin hanging Christmas decor? Because this baby is going on the wall very soon.

Wednesday, November 4, 2015

EPP Pentagon balls


Last night at the McKinney Modern Quilt Guild meeting,  we shared demos for quick & easy gift ideas for the holidays. I was happy to share the English Paper Pieced Pentagon Balls that I've been making. There are tons of great tutorials online for these, including this one which was the one I learned from. Abby, at While She Naps, has links for materials that I used & a great photo tutorial. But since I promised the gals at guild a tutorial too, here's my version!


First up, you are going to need 1 inch Pentagon (that's right! Not HEXAGONS like usual, but five sided pentagon) papers. You can print these online and cut your own (which is what I did initially) but Lynn over at Stitched With Love has ordered them to carry in the shop! Who wants to spend her time cutting silly pieces of paper when she can be stitching away instead. Yay Lynn! We love you!

Prep 12 pentagons your favorite way (I'm a glue baster. to each her own!) This is an awesome project to use up little scraps! I had fun fussy cutting and color coordinating scraps for each of my balls. Lay your 12 pentagons out like this....

now you stitch the bottoms of the pentagons in the rings to the center pentagon like this...
And then stitch up the sides like this, creating 2 cup shapes (easiest if you remove the paper from the center pentagon first)....
Easy squeazy, right? The next part is a little fussy but you can do it! Flip one of your pentagon cups upside down on top of the other and stitch the two together around the edges. Take it one edge at a time and remove the papers as you go, as soon as they have been surrounded by stitches....
Stop when you still have two edges left unstitched....
remove the last few papers, then carefully turn your ball right side out.

Now comes the fun part! It's time to fill your ball. Filling them with polyester fiberfill makes a perfect baby toy. I purchased jingle bell inserts from American Felt and Craft on Etsy and tucked them deep inside the stuffing. Then I stuffed the ball as full as I possibly could and stitched the final edges together securely.
that's the jingle bell insert in white plastic on the left
Need more ideas? The three balls at the top of this post are filled with plain old rice (uncooked of course!). You see, my husband loves to juggle! I keep them in a pretty bowl in the hallway and frequently as he walks by, he picks them up and starts to juggle!

Maybe you'd like to fill some with potpourri to add a pleasant scent to your living space or dresser drawers? Or fill them with crushed walnut shells for fun pin cushions for your sewing buddies? Stitch a ribbon on and they become Christmas tree ornaments. The possibilities are endless.


Tuesday, September 29, 2015

watercolor inspiration

My friend Kathie is a fiber artist, she weaves the most amazing pieces. You might remember that I visited her last year in Asheville, NC. Well, in the process of moving to a new city with her hubby, Kathie had a bad fall & has been off her feet for a bit. With her studio packed away in storage, Kathie has resorted to watercolors to explore color theory. Recently she posted this picture on Facebook and I commented that it looked like a quilt...
Kathie commented back "go for it" and I couldn't resist! Never mind that I should have been packing for our recent trip to NYC. I grabbed my notebook and a pencil and made a plan...
Dug into my stash and started cutting...
By the end of the day, I had this mini, an interpretation of Kathie's watercolor, ready to mail off to her...
I hope it brightens her day and helps the healing process somehow! It was a fun little project to tackle.


Tuesday, September 22, 2015

Inspiration everywhere!

I love finding inspiration every day in my normal environment. But when I travel I enjoy it even more! This trip to NYC was no different...
Check out this fantastic painting on the side of a building on the lower east side. It just made me smile and offers so much color inspiration! Wow!

I love markets too... always find inspiration there. Check out these beautiful veggies at the Chelsea Market...
Hubby found some inspiration of his own at Chelsea Market. He wanted to buy this....
And while he has turned into a wonderful chef, I'm pretty sure we don't need a pan that big now that it's just the two of us at home!

On a walk near our hotel we saw this amazing sculpture on the side of a building....
I'm not sure if those are real instruments (Cellos? They looked huge!) but it sure did make for an interesting display.

No matter how many times I go to New York City, I'm always seeing new things!