Friday, October 25, 2019

African Ladies

I wanted to do something special with the African fabrics I had accumulated (both fabrics I bought in Africa and those shared with me by friends. I scoured the internet and kept coming back to beautiful quilt made with this African ladies block....
I searched and searched but could not find a pattern for this, or a tutorial or anything! So, I pulled out my graph paper and drafted it myself. And now I have a finished quilt!

I love this so much. It will always bring me memories of my trip and my dear friends in Africa.
Look at this beautiful quilting done by my friends Diann and Jeff at Happy Quilts! I love the pattern she found for my quilt, it's perfect!

Tuesday, October 22, 2019

Mugrug swap

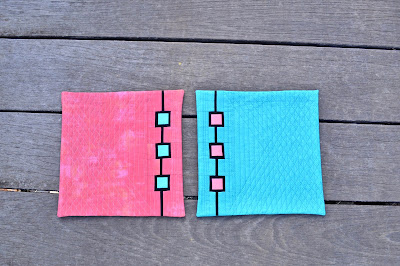
McKinney Modern Quilt guild just finished a Mugrug Swap with the North West Arkansas Modern guild. What fun! We were each assigned a partner so we knew who was making for us. I was assigned Elizabeth  and I was so excited when I saw how fun her work it. Earlier in the month, at our October meeting I received this beautiful mug rug....

I had told her about my love of red & aqua/teal and that I also love music. The dresden love? Either she got that by snooping on my feed or she guessed, but it's all spot on! I really love love love it!

Elizabeth said she loves teal, rainbows & cats. Here's the mug rug I sent to her (which she received this past week)...
She seems to like it, so I'm happy! It was such a fun swap.


Sunday, October 20, 2019

Color of the Year quilts on display


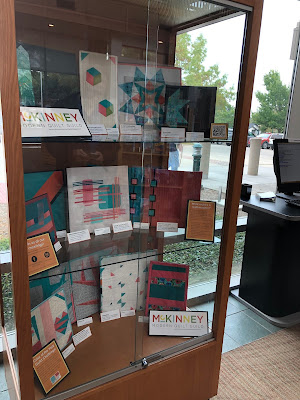
You might remember my color of the year quilts I shared earlier in the year, "mirror image". They were made with the Kona color of the year, Splash, and the Pantone color of the year, Living Coral. I made them as part of a challenge with the McKinney Modern Quilt Guild. Here are most of the other quilts and their makers...
This month the quilts are all hanging in a display case at The Roy and Helen Hall Memorial Public Library in McKinney, TX. Hubby and I went to check it out the other day...
Alice and Catherine, guild members who happen to be sisters, did an extraordinary job putting this display together! In a small space, they included a definition of Modern Quilting, labels that identified the makers and the modern elements displayed, and information about our guild. 

If you're in the area, do stop by and see our display. It will be featured until the end of October.


Friday, October 18, 2019

Bee Blocks

It's been a while since I caught you up on bee blocks! I'm in two bees now, The Solid Seven instagram bee and a McKinney Modern Quilt Guild bee. Love them both!

In fact, this month I am the queen bee for BOTH bees! I don't know how that happened. I debated having both bees make the same block, but in the end went with 2 completely different themes. The Solid Seven are making me Groovy 70s blocks! They are starting to roll in and I can't wait to share them with you down the road! Meanwhile here are a couple of blocks I made to inspire them:
the blue squares represent the Brady Bunch intro

I plan to make a bunch of extra groovy flowers to use as filler blocks
Meanwhile, the MCKMQG girls are busy making me Japanese X&+ blocks in monochromatic pinks and oranges....
Earlier in the year, the Solid Seven girls made me these improv citrus string pieced blocks...
Add caption
As you can see, I have these all pieced together. It needs something! I have a couple of ideas, I just haven't gotten around to it yet. Soon, I promise.

Some more been blocks I've made in recent months...
black & white with a splash of color improv for Nicole

these fun blocks for Loide

and improv face blocks (super challenging!) for Ailish
There are lots more that I've made, but this will give you a taste.


Thursday, September 26, 2019

Quilt Ladder Tutorial

I have a special guest blogger for you today! Recently my awesome hubby, Rick, build me some quilt racks for our home. They are simple to make and so sturdy. He has created this tutorial and given me permission to share it with you. Enjoy!


Material List
1) 3 - 2"x4"x8'      Select best looking, straightest pieces with the fewest knots and least warp
2) 12 - #2 Phillips 10 x 2 1/2" Wood Screws
3) 1 Quart paint color of choice or stain of choice
4) 1 Bristle brush or 1 pack of 1 1/2" sponge brushes
5) Adhesive Chair Leg Pads (Cut to size or use push pin types)

Tools
1) Saw (Power Miter Saw or Circular Saw preferred)
2) Power Drill (Use 1/8" bit for pilot holes and use Phillip head bit for wood screws)
3) Sand Paper to prepare surfaces for finish
          Sand by hand or with Power Sander (Palm Sander)
          Grit Numbers from 100 - 180 perform well with both hand sanding and power sanding
4) Small Level
5) T-Square for drawing straight, level lines

Prepare the Pieces
Cut 1' off each of the 3 - 2"x4"x8' pieces using the saw
      This is a total of 3 cuts, 1 for each board
      Remove / cut off the least attractive ends that have the most flaws
Select the best looking (with the least flaws) 2 - 7' long pieces to be used as the sides, considering which should be top end, front facing and side facing
      These will now be known as the "side rails"
      Use a pencil to note Top, Front
At the bottom of each side rail (2), make an angled cut so when the finished rack leans against a wall, the bottom of the side rails will be flat against the floor
      Lean each side rail against a wall at the desired "lean" angle
      Set the level flat on the floor against the rail
      Using a pencil make a line on the side of the rails using the top of the level as a guide
          This will give you the necessary angle to cut
Using the saw, cut along the "angled" mark at the bottom of the 2 side rails
Set aside the side rails

Cut the 1 remaining 7' long piece in to equal lengths of 14"
      Resulting 6 pieces will be the "cross bars"
      Measure 14" from one end and mark a line using the T-Square
          Continue measuring every 14"
          Should have a total of 5 lines
          Make 5 cuts, one cut on each of the 5 lines drawn

Sand all pieces (side rails and cross bars) as smooth as desired

When satisfied with sanding, paint or stain all pieces
      Apply as many coats as desired


Assemble
Take one side rail...
Starting at the top of the selected side rail, on the wider (2 1/2") side that will be on the inside of the finished rack, measure down from the top of the side rail 6" and mark a line across using the T-Square
Then measure down 1 1/2" from the first line and mark a line across
      A cross bar will fit between the two lines just marked
Then measure 12" down from the second line and mark a line across
Then measure 1 1/2" down and mark a line across
Repeat marking the side rail for a total of 6 cross bars
Repeat all steps on the second side rail

Take one side rail...
On the outside of the selected side rail, drill pilot holes through the side raid in the middle of the lines denoting where the cross bars go
      You will have to approximate (eye-ball) where to drill
      One hole for each cross bar
Repeat on second side rail

Final Assembly
Attach cross bars to the side rails using the pre-drawn lines as guides (cross bars should be set inside each set of drawn lines
      Screw (using the drill) in to place using the pre-drilled pilot holes and wood screws
      Fasten (screw) cross bards to one side rail at a time
If desired, attach Chair Leg pads to the bottom of each side rail (on angled cut) to prevent scratching of the floor and sliding


Tuesday, September 24, 2019

grocery bag tutorial

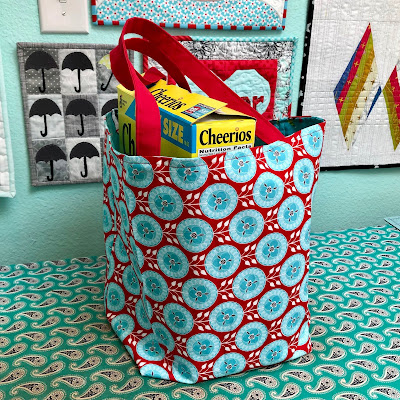
Ten years ago (TEN YEARS! WOW!) I published a pattern for a grocery bag I had designed called the Nantucket bag. Since then I have modified and simplified it many times. I always get compliments from the ladies at the grocery store about my bags.... and they are so simple to make! Here's a basic, easy tutorial so you can make some of your own.
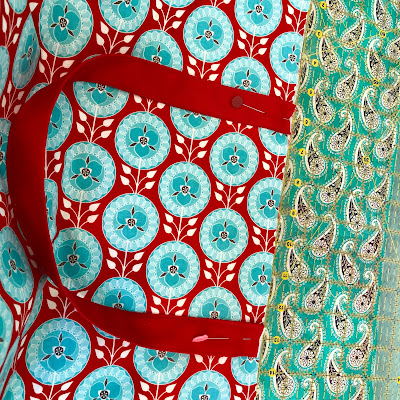
 2 bags I made from fabric I brought home from Africa

Materials needed:
fabric 20"x36" for outside of bag (depending on the weight of your fabric, you might want to interface this piece)
fabric 20"x36" for lining of bag
2 straps 20" long each (purchased webbing works great, or 2 pieces of fabric 4"x20" to make your own)

If you are making straps.....
Fuse a piece of interfacing (2"x20") in the center of each strap
Fold each edge to the center, then fold the straps in half....
edge stitch both long edges of each strap, then set the straps aside
Take your outside fabric. Fold it in half so that the folded edge is at the bottom. Then cut a 4" square out of each bottom folded corner
Refold your bag right sides together and stitch the side seams

Now box the corners by stretching out the cutout squares and sewing straight across. 

Now follow those same steps with your lining fabric. The only thing you need to do different is to leave a 3" section of one side seam unstitched so you can flip your bag right side out later on.

Add your handles to both sides of your finished outside bag piece. I found the center of each side and measured out 3" in each direction, leaving a 6" gap between each end of the handle. Baste both handles in place.
Now take your outside bag (right side out) and place it inside your lining bag (inside out). Tuck the handles inside and clip or pin around the top of your bag. Stitch around the top of the bag, making sure you catch the ends of your handles in the seam.

Turn your bag right side out through your side seam hole and stitch the hole closed. Press the top of the bag and stitch around the top of the bag to secure your lining.....
yes, I realize my fabric is sideways. oh well. it's a grocery bag!

And there you have it! I like to have a solid bottom in my bags. To do this, I cut a piece of plywood (8"x11") and then make a little "pillowcase" to slide it into, and place it in the bottom of the bag. The pillowcase is removable if it needs washing and the plywood is lightweight but never bends or breaks. 

I'm thinking grocery bags will be my go to Christmas gift this year!

Friday, September 13, 2019

towels

Sometimes I'm a bad blogger but that doesn't mean I haven't been creating. I tend to default to Instagram lately (follow me at Ellynz) but then it's always good to check in here now & then. I've been weaving lots of towels the last month or two. Always playing with color. And all of these have new homes now....
These are Christies.

Two of these went to Diana in exchange for some of her gluten free/vegan cookies. Oh man were they delicious! You can order some for yourself at Suspiro Bakeshop. Diana was part of our mission team in Africa this past summer. When she told me she bakes gluten free cookies I couldn't wait to taste them. She sent me chocolate chip and oatmeal raisin cookies. Don't ask me which ones were my favorites - I could never choose! 

The other two of these towels went to Martha.

These were for my friend Chris.


And these are Mari's.

And so, my loom is currently empty. BUT..... I got to visit Hill Country Weavers for the first time last weekend and came home with delicious bamboo/cotton yarn that I can't wait to warp on the loom. More on this awesome shop and the yarn I bought there coming soon!


Thursday, August 22, 2019

Plano Quilt Show 2019

The McKinney Modern Quilt Guild had a great showing at the Plano Quilt Show this year! We had encouraged our members to enter more quilts this year, and enter they did! You can see all of their entries here

I entered two of my quilts in the Modern Category. Left Out and Be Calm, which they hung right together. Be Calm got a ribbon for honorable mention!

And I was part of two group quilts, both of which received third place ribbons! My Gnome in the Christmas Forest, made with bee blocks from my Solid Seven Bee mates and a gnome by my friend Chris (Quilted by Jeff Loper at Happy Quilts), 
Chris and I together at the show!
and Seismic Log Cabin, made by my small group, the Comedy Club Quilters....
Some of our Comedy Club Quilters; Chris D, Beth, me, Chris S, Bonnie & Anne 


It was great fun to attend the show with my friends and see all of the fabulous entries! 


Saturday, July 27, 2019

Africa

I'm finding it difficult to put my recent mission trip to Eswatini, Africa into words. Here are some photos to give you a taste of our journey.
traveling with my daughter, Leigh Anne was awesome
meeting Phumla and Okuhle, my sponsor kids, was a huge highlight

the kids at the Children's Cup care point love selfies
enjoying a healthy meal at the care point

This woman is amazing. I'm thinking she deserves her own blog post...
I made fabric bracelets with the kids in the after school program. They loved it!

Safari at Hlane National Park
The lions were calm in the evening. In the morning? not so much!
picture perfect sunset
Huge thank you to missionaries Gethen and Bex Amos and their gorgeous children for hosting us

The Liberty Global Mission Team

You can learn more about Liberty Church and Children's Cup at their websites.


Monday, July 1, 2019

Birds!

A couple of months ago, a beemate of mine made 2 adorable bird quilts and when I asked about them, she steered me to a free tutorial! So I made a bird.
And I really enjoyed it! so I made another.
And another, and another, and another...... another beemate said "let's swap a few birds!" and I thought that was a great idea. Before I knew what was happening, 14 ladies were signed up to make birds to swap with me as their fearless leader! YIKES! (check out our hashtag, #birdswap2019)

By the end of May (yes, ALL 14 ladies sent their birds ON TIME!) I had a huge collection of birds on my design boards ready to swap....


152 birds, if I'm counting correctly. And they were ALL fabulous! I sent them flying off to their new homes and set to work on my own bird quilt.

Back when I posted my first few birds, my friend Martha said they had her singing "Come on Get Happy" by the Partridge Family. Remember that song? and it's cute bird logo? Well that was all the inspiration I needed! I used Heather Givens (Crimson Tate) Noteworthy pattern for the improv letters. I love her pattern! 


My Get Happy quilt fits perfectly with my word of the year.... JOY! It was quilted by my friend Diann of Happy Quilts with whimsical music notes and I absolutely love it! oh, and the upside down bird? yes it was intentional. 

As if that wasn't enough, for my Fifth Saturday Challenge project for Not Your Mama's Quilt Store I had to make more birds....
whew! now on to the next rabbit hole! stay tuned