Showing posts with label sew along. Show all posts

Thursday, May 18, 2023

Triangles everywhere, all at once

 I just realized I left you hanging. I never shared my completed Improv Triangle Sewalong quilt.... although I did share some of my process here. Well it's finished! Introducing, Triangles everywhere, all at once...


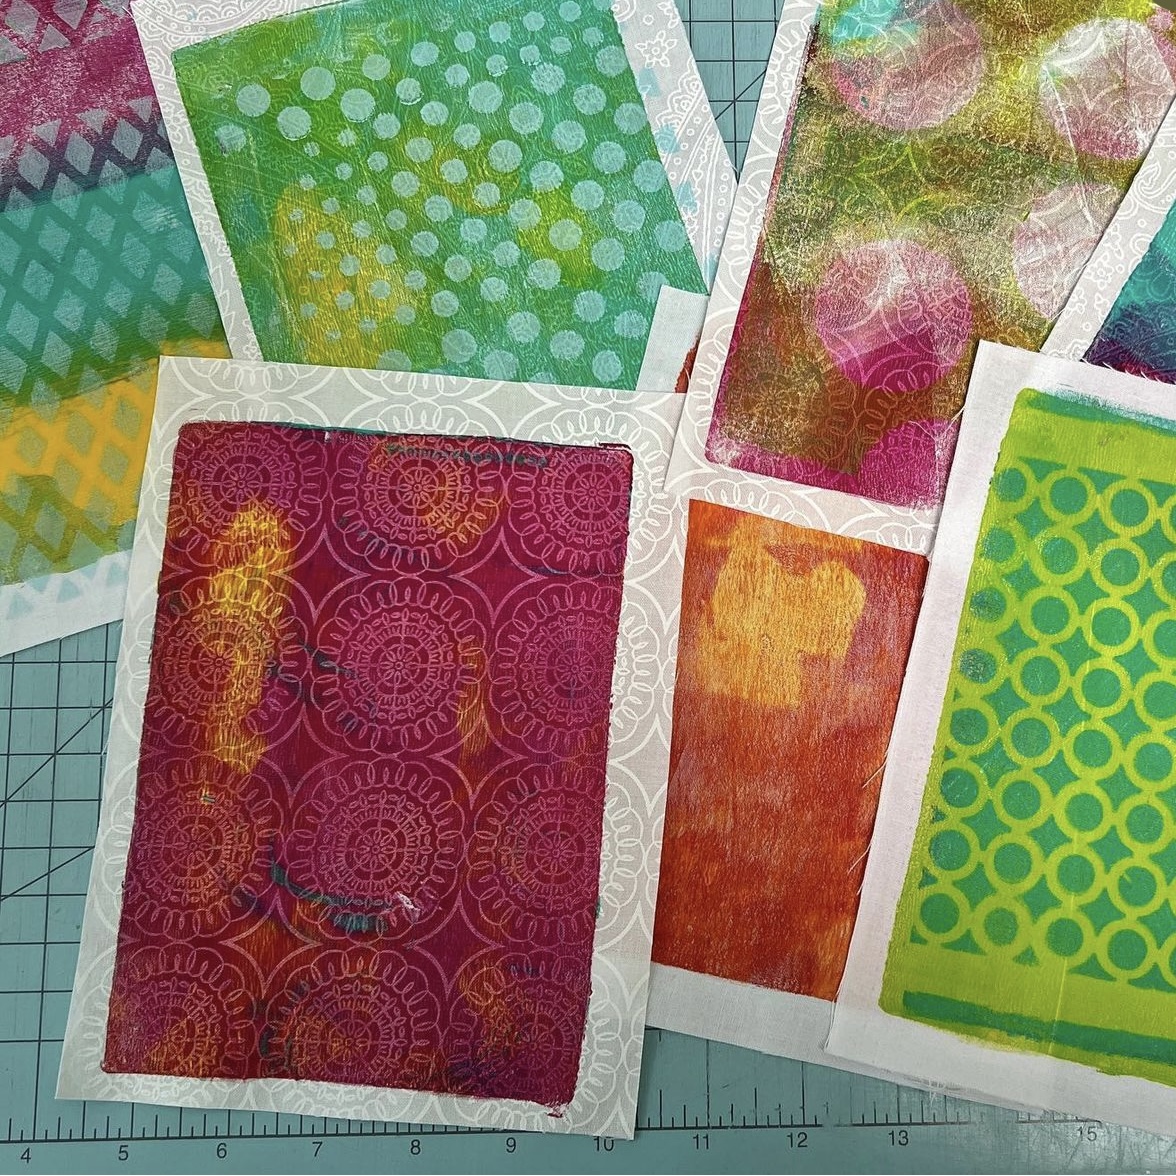
The improv triangle units were made using the process Nicholas Ball spells out in his book, Inspiring Improv. I used fabric I had painted with my gel plate and acrylic paints for the triangles and assorted teal, aqua and orange solids from my stash.

When it came time to quilt, I went a little bananas! It is all walking foot quilted on my domestic machine (a Janome 6600). I stitched giant triangles and then echo stitched them, using several shades of aqua thread. There are also some hand stitched triangles in there which are hard to see here. It was loads of fun!

Monday, February 13, 2023

Another Improv Triangle Sewalong

 Well, I didn't mean to start another quilt but here we are. I can't resist Nicholas Ball's (@quiltsfromtheattic) improv triangle sew alongs, I've participated twice before (here and here) and when he announced a third opportunity to sew along with him I jumped right in.

As I told you in my last post, I've been enjoying gelli printing lately. I had a stack of fabrics I had painted and quickly decided those should be triangles...


After lots of cutting I had almost 90 triangles ready to sew! I pulled out my teal/aqua solids and began making triangle units using Nicholas' method. His improv book is one of my favorites! It was looking a bit ho hum to me until my friend Sarah suggested I add splashes of orange. Perfect!


Triangle units began to gather on my design wall. Then I went into crazy mode and couldn't stop sewing.

By the end of week two, this is where I landed. Week three is all about joining the triangle units together. If you look closely, you can see that I already got a jump start on this process. The middle section of my quilt is all puzzled together. This is my favorite part of improv quilting, puzzling the pieces together. I will have a finished quilt top by the end of this week and look forward to sharing it with you.


Friday, October 29, 2021

Triangle Trees

 Who else loves a good sew-along? I was excited when Nicholas Ball announced another Improv Triangle Sew-along this month. His improv book is one of my very favorites and his triangle method is the best. First I thought, can I do this? I don't want to neglect my Through Ellyn's Eyes project. boo. Then I thought, wait! What if I make it part of my project?! Jackpot. 

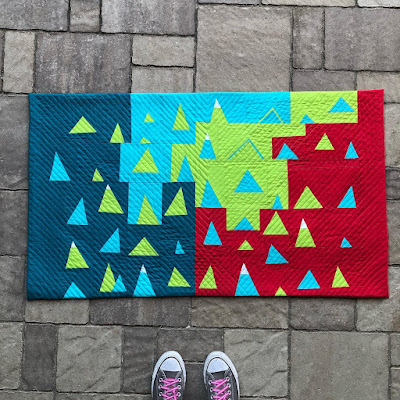
This time around, Nicholas encouraged us to make our triangles holiday trees. I pulled the colors from my project that speak Christmas to me, Kona Red, Chartreuse, Glacier and Capri with a bit of Kona White thrown in. 

First up, make a pile of triangle blocks...

look at the awesome snow capped trees! suggested by Nicholas

Then I started moving them around on my design wall. This is one of my favorite parts of improv quilting...
My layout changed a bunch of times before I landed on this completed quilt. Here it is, all done! It's the biggest quilt in my series so far, 43"x25". Walking foot quilted in all the colors on my domestic machine and faced for a nice clean edge.

like my cute shoelaces? I wove them on my inkle loom

You can see the quilting better in this photo. I love where the colors cross at the bottom...


So there it is! Quilt #13, Triangle Trees! 


Monday, March 2, 2020

Improv triangle sew along

Ever since I received  Nicholas Ball's book, Inspiring Improv, for Christmas I've been intrigued with his techniques. So when he announced his improv triangle sew along on Instagram, I was gently nudged by friends and decided to join in. With Quiltcon smack dab in the middle of the sew along and other commitments I had made, I decided to join on a small level. To start, I made 30 triangle units to assemble into a mini quilt.
I made these all from my scrap bins, using solids and prints that read solid in pinks and aquas.

By the end, I had this awesome mini and and a new triangle technique under my belt...'
I quilted it on my domestic machine with a walking foot, horizontal lines 1 inch apart and 30 degree angled lines coming from both directions, which forms a lovely triangle at the bottom, hard to see in the photos but I rather like it...
Thanks for the great opportunity, Nicholas! I'm so glad I joined in. If you want to see more of the sew along check out the hashtag #improvtrianglesewalong. Many made large and gorgeous quilts!


Sunday, January 7, 2018

Tiny Dresden Party

Deidre over at Quilty Obsession has introduced  a fun sew along over on instagram #tinydresdenparty. You'll want to check out all of the amazing things being shared on that hashtag! So much fun. The idea is to create dresdens smaller than 5" diameter & make things from them. Always the rule breaker (in sewing anyways, I'm totally a rule follower in life), I have been making tiny dresdens from my solid scraps.
These all measure 4 1/2 - 5 inches across. Crazy! Also, I didn't want huge holes in the center of my tiny dresdens (although many over on instagram are fussy cutting fabulous large circles for their centers).  I made myself templates using my various dresden rulers. I simply extended the narrow edge of the templates, continuing the same angle, until the bottom of each wedge was just over 1/2". This way when I created my dresdens, I ended up with small holes in the center.

Tons of instagramers (is that a word?) are putting their tiny dresdens on pin cushions or pouches and they are so cute! I decided I wanted to put mine into hoops & add embroidery and embellishments. I chose the rainbow dresden for my first week's hoop
After I appliquéd my dresden to a black grunge background, I filled the center hole with tiny black sequins.
I added some chain stitch lines to match each wedge and then, because I simply couldn't leave well enough alone, I filled the negative space with more tiny black sequins.
I love this in a 7 inch hoop. And yes, I decided the hoop needed to be black. Did I have any black paint? No. Sharpie marker to the rescue! I only had one hoop this size, so I'm waiting on an Amazon order to continue this project.

Stay tuned for more tiny dresden hoops to come.

Friday, August 25, 2017

Improv stripes

A few weeks ago, Debbie, over at A Quilter's Table, started an improv stripes sew along. On the first day she gave us a tutorial for how she makes her blocks. This happened to coordinate with my retreat so, after finding some internet when we went into town, I read her post and set to work! I used all black and white prints, along with black, white & a bit of yellow solids.
Once I got home, it was fun to rearrange the blocks, trim them up to make them fit, and assemble them into a finished quilt. Because I don't usually follow the rules (though admittedly, Debbie didn't make any rules, so that was helpful!) I added some appliqué flower petals to my finished top. 

I quilted it on my domestic machine, starting with a yellow spiral in one corner, then adding white lines here and there...
My finished quilt is 25" x 30". I was happy to add this improv method to my toolbox!
Check out all of the beautiful quilts on Instagram at #improvstripesqal 

Saturday, August 12, 2017

little llama softie

A couple of weeks ago, Jennifer Jangles had  a sew along with her little llama softie pattern. Since Ally loves llamas, I had already purchased the pattern. Naturally I decided to sew along!
What a fun pattern, and easy too! I used sherpa fur for her body. I hadn't sewn with fur in a long time, but Jennifer gave great tips and it was easy to do.
Wool felt for her muzzle. Also, I used the black safety eyes, not that Ally needs them, ha! something new for me. They worked out great . I put a bow on her head so everyone would know she is a girl (never mind the pink ears which should give it away.)

A blanket from my stash, with aqua ric rac and tiny pompoms, because, why not?
Ally loved her so it's a success! Check out some of the other llamas made during the sew along here, on Jennifer's blog.