Thursday, September 26, 2019

Quilt Ladder Tutorial

I have a special guest blogger for you today! Recently my awesome hubby, Rick, build me some quilt racks for our home. They are simple to make and so sturdy. He has created this tutorial and given me permission to share it with you. Enjoy!


Material List
1) 3 - 2"x4"x8'      Select best looking, straightest pieces with the fewest knots and least warp
2) 12 - #2 Phillips 10 x 2 1/2" Wood Screws
3) 1 Quart paint color of choice or stain of choice
4) 1 Bristle brush or 1 pack of 1 1/2" sponge brushes
5) Adhesive Chair Leg Pads (Cut to size or use push pin types)

Tools
1) Saw (Power Miter Saw or Circular Saw preferred)
2) Power Drill (Use 1/8" bit for pilot holes and use Phillip head bit for wood screws)
3) Sand Paper to prepare surfaces for finish
          Sand by hand or with Power Sander (Palm Sander)
          Grit Numbers from 100 - 180 perform well with both hand sanding and power sanding
4) Small Level
5) T-Square for drawing straight, level lines

Prepare the Pieces
Cut 1' off each of the 3 - 2"x4"x8' pieces using the saw
      This is a total of 3 cuts, 1 for each board
      Remove / cut off the least attractive ends that have the most flaws
Select the best looking (with the least flaws) 2 - 7' long pieces to be used as the sides, considering which should be top end, front facing and side facing
      These will now be known as the "side rails"
      Use a pencil to note Top, Front
At the bottom of each side rail (2), make an angled cut so when the finished rack leans against a wall, the bottom of the side rails will be flat against the floor
      Lean each side rail against a wall at the desired "lean" angle
      Set the level flat on the floor against the rail
      Using a pencil make a line on the side of the rails using the top of the level as a guide
          This will give you the necessary angle to cut
Using the saw, cut along the "angled" mark at the bottom of the 2 side rails
Set aside the side rails

Cut the 1 remaining 7' long piece in to equal lengths of 14"
      Resulting 6 pieces will be the "cross bars"
      Measure 14" from one end and mark a line using the T-Square
          Continue measuring every 14"
          Should have a total of 5 lines
          Make 5 cuts, one cut on each of the 5 lines drawn

Sand all pieces (side rails and cross bars) as smooth as desired

When satisfied with sanding, paint or stain all pieces
      Apply as many coats as desired


Assemble
Take one side rail...
Starting at the top of the selected side rail, on the wider (2 1/2") side that will be on the inside of the finished rack, measure down from the top of the side rail 6" and mark a line across using the T-Square
Then measure down 1 1/2" from the first line and mark a line across
      A cross bar will fit between the two lines just marked
Then measure 12" down from the second line and mark a line across
Then measure 1 1/2" down and mark a line across
Repeat marking the side rail for a total of 6 cross bars
Repeat all steps on the second side rail

Take one side rail...
On the outside of the selected side rail, drill pilot holes through the side raid in the middle of the lines denoting where the cross bars go
      You will have to approximate (eye-ball) where to drill
      One hole for each cross bar
Repeat on second side rail

Final Assembly
Attach cross bars to the side rails using the pre-drawn lines as guides (cross bars should be set inside each set of drawn lines
      Screw (using the drill) in to place using the pre-drilled pilot holes and wood screws
      Fasten (screw) cross bards to one side rail at a time
If desired, attach Chair Leg pads to the bottom of each side rail (on angled cut) to prevent scratching of the floor and sliding


Tuesday, September 24, 2019

grocery bag tutorial

Ten years ago (TEN YEARS! WOW!) I published a pattern for a grocery bag I had designed called the Nantucket bag. Since then I have modified and simplified it many times. I always get compliments from the ladies at the grocery store about my bags.... and they are so simple to make! Here's a basic, easy tutorial so you can make some of your own.
 2 bags I made from fabric I brought home from Africa

Materials needed:
fabric 20"x36" for outside of bag (depending on the weight of your fabric, you might want to interface this piece)
fabric 20"x36" for lining of bag
2 straps 20" long each (purchased webbing works great, or 2 pieces of fabric 4"x20" to make your own)

If you are making straps.....
Fuse a piece of interfacing (2"x20") in the center of each strap
Fold each edge to the center, then fold the straps in half....
edge stitch both long edges of each strap, then set the straps aside
Take your outside fabric. Fold it in half so that the folded edge is at the bottom. Then cut a 4" square out of each bottom folded corner
Refold your bag right sides together and stitch the side seams

Now box the corners by stretching out the cutout squares and sewing straight across. 

Now follow those same steps with your lining fabric. The only thing you need to do different is to leave a 3" section of one side seam unstitched so you can flip your bag right side out later on.

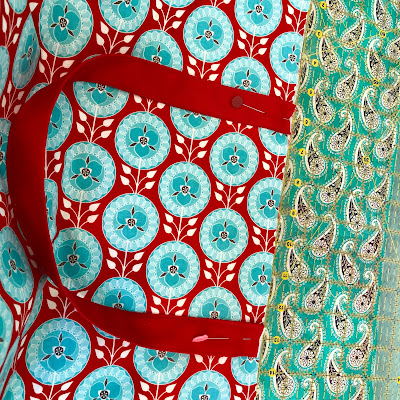
Add your handles to both sides of your finished outside bag piece. I found the center of each side and measured out 3" in each direction, leaving a 6" gap between each end of the handle. Baste both handles in place.
Now take your outside bag (right side out) and place it inside your lining bag (inside out). Tuck the handles inside and clip or pin around the top of your bag. Stitch around the top of the bag, making sure you catch the ends of your handles in the seam.

Turn your bag right side out through your side seam hole and stitch the hole closed. Press the top of the bag and stitch around the top of the bag to secure your lining.....
yes, I realize my fabric is sideways. oh well. it's a grocery bag!

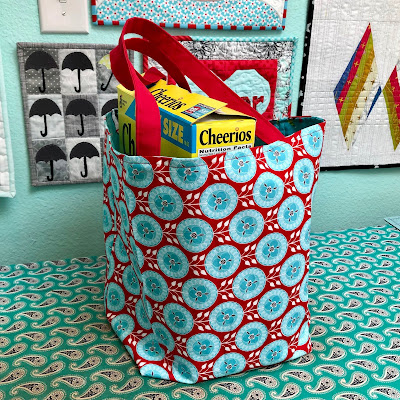
And there you have it! I like to have a solid bottom in my bags. To do this, I cut a piece of plywood (8"x11") and then make a little "pillowcase" to slide it into, and place it in the bottom of the bag. The pillowcase is removable if it needs washing and the plywood is lightweight but never bends or breaks. 

I'm thinking grocery bags will be my go to Christmas gift this year!

Friday, September 13, 2019

towels

Sometimes I'm a bad blogger but that doesn't mean I haven't been creating. I tend to default to Instagram lately (follow me at Ellynz) but then it's always good to check in here now & then. I've been weaving lots of towels the last month or two. Always playing with color. And all of these have new homes now....
These are Christies.

Two of these went to Diana in exchange for some of her gluten free/vegan cookies. Oh man were they delicious! You can order some for yourself at Suspiro Bakeshop. Diana was part of our mission team in Africa this past summer. When she told me she bakes gluten free cookies I couldn't wait to taste them. She sent me chocolate chip and oatmeal raisin cookies. Don't ask me which ones were my favorites - I could never choose! 

The other two of these towels went to Martha.

These were for my friend Chris.


And these are Mari's.

And so, my loom is currently empty. BUT..... I got to visit Hill Country Weavers for the first time last weekend and came home with delicious bamboo/cotton yarn that I can't wait to warp on the loom. More on this awesome shop and the yarn I bought there coming soon!